
Quick Summary
Knowing how to clean flooded basement spaces quickly is critical to preventing structural rot, mitigating electrical hazards, and stopping mold growth within the EPA's 24 to 48-hour window. Wade's Restoration outlines the essential mitigation sequence, including utility shutoffs, protective gear, rapid water extraction, flood cuts on saturated drywall, and thorough surface disinfection. Readers will gain the actionable steps needed to safely tackle initial cleanup and recognize when to call Wade's Restoration 24/7 for a guaranteed 45-minute emergency response and free visual inspection.
How to Clean Flooded Basement Fast and Prevent Mold
When you walk downstairs and find several inches of standing water in your basement, your instincts tell you to pump it out immediately and start scrubbing. Moving fast is necessary, but moving without a clear sequence can create severe electrical and health hazards. According to the EPA, you should dry the home and contents within 24 to 48 hours; if they cannot be dried in that time, assume mold may have grown. The CDC documented that after Hurricane Harvey, 76% of 37 respondents who reported first-floor flooding said they saw or smelled mold.[5]
Cleaning a flooded basement is a race against time and moisture migration. Below is the step-by-step process professional restoration technicians, such as the team at Wade’s Restoration, use to extract water safely, clean contaminated surfaces, and dry the space before mold colonies establish themselves. See also Flooded Basement Cleanup – Call Now-10% Off – Same-Day Service – Free Estimate.
Flooded Basement Emergency Action Plan: What You Need and First 60 Minutes
Emergency Summary: Never step into standing water until you confirm power is disconnected. Suit up with an N-95 respirator, goggles, and protective gloves. Once the area is cleared of electrical and structural hazards, pump water out safely, bag saturated porous items, scrub hard framing with water and detergent, and run commercial dehumidifiers to facilitate drying.[3]
The first hour after discovering water determines whether a flooded basement results in a straightforward dry-out or tens of thousands of dollars in hidden structural rot. Water naturally travels toward dry areas, wicking up drywall, settling into sill plates, and seeping behind party walls in attached pre-war buildings.
Essential Safety Gear and Cleanup Equipment Checklist
Basement floodwater frequently contains street runoff, chemical residues, and raw sewage from storm drain backups. Do not attempt cleanup without proper personal protective equipment (PPE):
- PPE: The supported minimum PPE is an N-95 respirator, goggles, and protective gloves. Any added gear (such as half-face respirators, unvented goggles, or rubber work boots) represents recommendations requiring separate verification.
- Water Extraction: A submersible trash pump with a reinforced discharge hose, a heavy-duty wet/dry vacuum with an auto-shutoff float, and squeegees. Operational advice for equipment represents recommendations requiring separate verification.
- Cleaning & Sanitizing: Heavy plastic contractor trash bags, stiff nylon-bristle scrub brushes, unscented household detergent, and clean rinse buckets.
- Drying Equipment: Dehumidifiers, air movers, and a moisture meter to track drying progress inside walls and subflooring.
The First 60 Minutes: Immediate Hazard Mitigation
Before touching a pump or carrying boxes upstairs, complete these immediate mitigation steps:
- Kill the Utilities: Shut off power at the main breaker only if the panel is dry and accessible from outside the flooded area. If the panel is in the basement, call your utility provider to pull the meter remotely. Shut off the main gas valve if water has reached water heaters, boilers, or low-lying gas supply lines.
- Photograph Everything: Take wide-angle photos and video of water height against the walls, submerged mechanical systems (furnace, water heater, electrical boxes), and all damaged personal property before moving anything. This visual evidence is vital for your flood insurance adjuster.
- Identify the Water Source: Check whether water is rising from a floor drain, entering through foundation mortar joints, or pouring from an internal plumbing line. If an interior pipe burst, turn off the main water shutoff valve immediately.
Step 1: Shut Off Power and Eliminate Sub-Basement Hazards
Water conducts electricity across an entire concrete slab instantly if a submerged appliance, outlet, or extension cord remains live. Do not wade through standing water to reach an electrical breaker box. Wait for an emergency service call from your local electric utility or a licensed electrician to verify the circuit is completely dead before stepping onto a wet concrete floor.
Navigating Electrical and Gas Line Hazards in Pre-War Basements
Older homes throughout the Northeast and urban areas often feature legacy knob-and-tube wiring, ungrounded junction boxes mounted below eye level, and aged iron gas lines. Submerged water heater pilot assemblies and boiler burners can leak natural gas directly into an unventilated basement. If you smell gas (a distinct rotten-egg odor) or hear hissing, leave the building immediately and call your utility company and 911 from the street.
Assessing Contamination and Safety Hazards
Floodwaters can carry harmful contaminants and bacteria. The CDC noted that among the 22% who did heavy cleanup after Hurricane Harvey, the median duration was 7 days. Wear an N-95 respirator, goggles, and protective gloves throughout debris removal.[1]
Step 2: Check Safety and Obtain Professional Guidance
Need how to clean flooded basement?
We’re available now - call for a fast, free estimate.
Safety Warning: Before removing standing water, check safety and obtain professional guidance where structural hazards may exist.
Assessing Structural Safety
Water saturation around foundation walls can pose structural risks. Check for signs of structural movement, cracking, or bowing. Where structural hazards may exist, obtain professional guidance from a structural engineer or qualified professional like Wade’s Restoration before pumping out water.
Water Removal Guidelines
- Wait for External Water to Recede: Ensure outside floodwaters have receded before beginning major water extraction.
- Inspect Foundation Walls Constantly: Watch mortar joints, stone alignments, and poured concrete walls for cracking, bulging, or shifting. If you notice structural movement, stop pumping immediately and contact a structural engineer.
- Obtain Professional Guidance: Where structural hazards may exist, consult professionals for safe water removal.
Step 3: Remove Saturated Porous Materials and Bulk Debris
Once standing water is removed, clear out contaminated materials quickly. Porous items absorb water deep into their fibers, acting as long-term moisture reservoirs that feed mold spores long after the air feels dry.
Identifying Salvageable vs. Non-Salvageable Items
Make clear decisions about what stays and what goes based on material porosity:
- Discard Immediately: Wet fiberglass or cellulose insulation, cardboard boxes, upholstered furniture, mattresses, area rugs, wall-to-wall carpeting and padding, and laminate or engineered wood flooring soaked by floodwater.
- Perform Flood Cuts on Drywall: Drywall wicks water upward behind the surface paper. Cut away drywall and remove insulation above the highest water line visible on the wall studs.
- Salvageable Items: Solid wood framing studs, concrete slabs, metal shelving, glass, and solid plastic storage bins, provided they are thoroughly scrubbed, sanitized, and dried.
Safe Removal of Damaged Materials
Bag contaminated debris before carrying it through living areas upstairs to prevent dripping dirty water onto clean floors. Keep personal property separated into salvageable and non-salvageable piles so insurance adjusters can inspect the discarded inventory if required.
Step 4: Deep Clean and Disinfect All Hard Surfaces
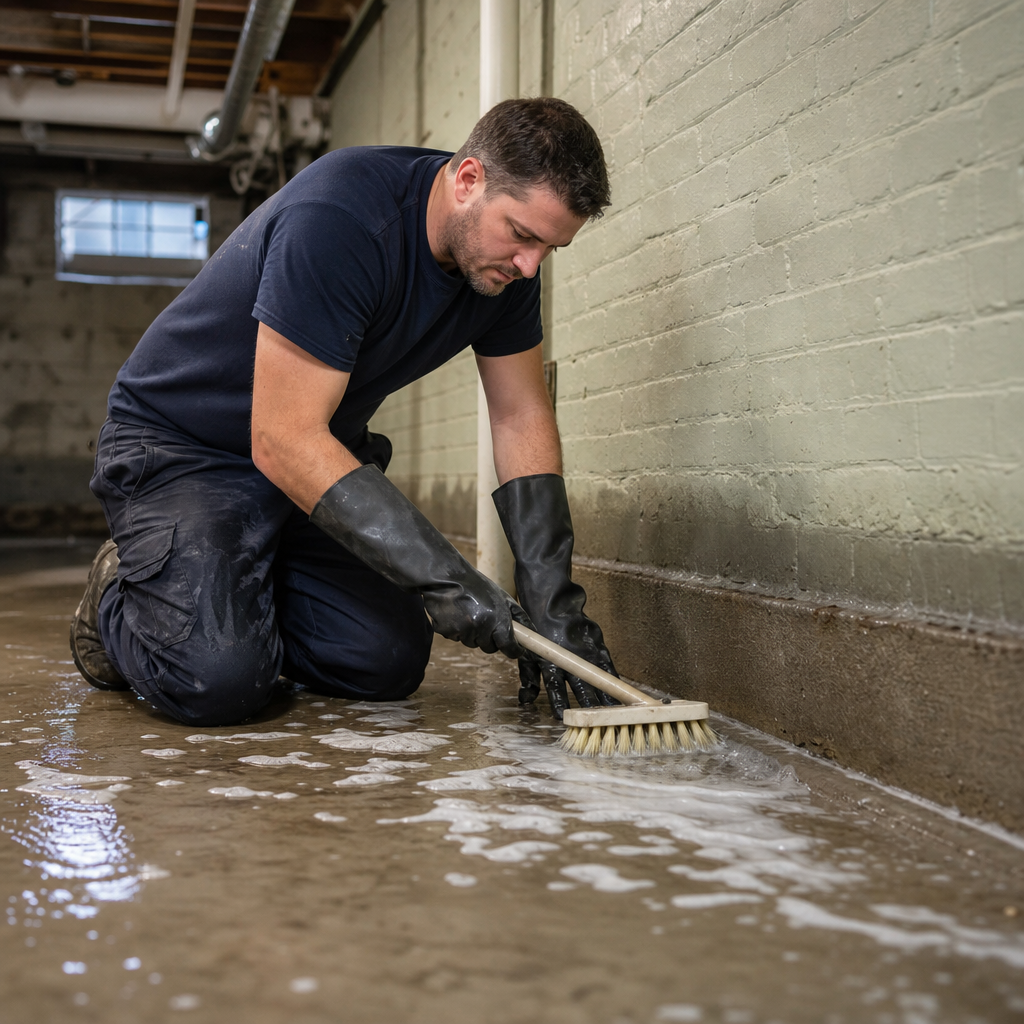
Floodwaters leave behind silt, organic matter, and bacteria that clings to framing studs and concrete floors. You must mechanically remove this organic layer before applying disinfectants.
Cleaning Hard Surfaces
Many homeowners make the mistake of spraying straight chlorine bleach on bare concrete and wood studs. Bleach is not an effective solution for porous materials like brick, concrete, and unsealed lumber. Instead, as specialists at Wade’s Restoration recommend, use an EPA-registered disinfectant after scrubbing with water and detergent.
Step-by-Step Surface Cleaning
- Shovel and Vacuum Silt: Remove mud, silt, and heavy residue from the concrete slab.
- Scrub with Detergent: Wash all exposed wood studs, concrete walls, and floors using stiff nylon brushes, water, and household detergent.
- Rinse and Extract: Rinse surfaces with clean water and vacuum up the rinse water immediately using a wet/dry vacuum.
- Apply Disinfectant: Apply an EPA-registered disinfectant evenly across all exposed surfaces, following the product label directions before wiping or drying.
Step 5: Execute Rapid Structural Drying to Prevent Mold
Need how to clean flooded basement?
We’re available now - call for a fast, free estimate.
Structural drying requires controlling humidity to draw moisture out from framing timbers and masonry.
Meeting the 24 to 48 Hour Drying Window
The EPA advises drying the home and contents within 24 to 48 hours; if they cannot be dried in that time, assume mold may have grown.[2]
Operating Drying Equipment Safely
Air movement and dehumidification work together to dry materials:
- Clean Visible Mold First: The EPA cautions that fans may spread mold if it has already started growing, and recommends cleaning visible mold before using fans.
- Set Up Dehumidifiers: Place dehumidifiers in the basement and route drainage away from the area. Seal exterior windows and doors so the dehumidifier pulls moisture from the basement structure.
- Position Air Movers: Direct air movers toward wet framing and floors to encourage evaporation once visible mold is cleaned.
- Track Moisture: Monitor framing studs, sill plates, and concrete with a moisture meter to track drying progress, a standard practice emphasized by Wade’s Restoration.
Structural Material Breakdown: Subfloor, Joists, and Masonry Care
Different building components hold water differently and require careful drying.
Subfloor and Support Joist Saturation Check
Basement ceiling joists and the subfloor directly above them can absorb moisture from rising basement humidity. Inspect overhead floor joists with a moisture meter to ensure they dry completely, as prolonged high moisture can weaken structural framing.
Drywall, Insulation, and Masonry
Brick, stone, and mortar foundations require careful management. Masonry draws water inward through capillary action. Trapped moisture behind basement wall paneling or finish coats can cause efflorescence and surface deterioration. Ensure masonry walls are allowed to dry thoroughly.
Flooded Basement Cleanup Considerations
While minor clean-water leaks can often be tackled independently, severe flood events, sewage backups, or structural cracking require professional water damage restoration from experienced providers like Wade’s Restoration. Certified restoration contractors bring specialized extraction units, drying equipment, and direct insurance documentation workflows that help protect the building structure.
Frequently Asked Questions About Flooded Basement Cleanup
How fast can mold grow after a basement flood?
The EPA advises drying the home and contents within 24 to 48 hours; if they cannot be dried in that time, assume mold may have grown.
What protective gear is required for cleanup?
At minimum, wear an N-95 respirator, goggles, and protective gloves. Any added gear represents recommendations requiring separate verification.
When is it safe to use fans and dehumidifiers?
Verify that your home electrical system is fully inspected and cleared of water hazards first. The EPA cautions that fans may spread mold if it has already started growing, and recommends cleaning visible mold before using fans.[4]
When should I consult a professional or building official?
Contact a professional restoration specialist, structural engineer, or local building official where structural hazards may exist, if standing water contains sewage, or if you cannot dry the space within 24 to 48 hours.
Need how to clean flooded basement?
We’re available now - call for a fast, free estimate.
Sources
- September 2019 – stacks.cdc.gov (2019)
- Homeowner’s and renter’s guide to mold cleanup after disasters – stacks.cdc.gov (2015)
- [PDF] Flood-Related Cleaning | EPA – epa.gov (2006)
- Flood Cleanup: Protecting Indoor Air Quality – October 2018 – epa.gov (2018)
- Hurricane-Associated Mold Exposures Among Patients at … – stacks.cdc.gov
Related reading: Can I Clean Black Mold Myself – 10% Off & Free Estimate – Same-Day Service
Related reading: Best Way to Remove Water From Basement – 10% Off & Free Estimate – Same-Day Service
Related reading: Flood Damage Insurance Claim – 10% Off & Free Estimate – Same-Day Service
Frequently Asked Questions
How high should flood cuts be made on basement drywall after water removal?
Flood cuts should generally be made 12 to 24 inches above the highest visible water line to remove damp insulation and stop moisture wicking. If water has migrated higher behind framing, contact Wade's Restoration 24/7 for a free visual inspection and commercial thermal drying to prevent hidden mold.
How can I tell if moisture remains trapped in concrete foundations after cleaning a flooded basement?
Concrete and masonry foundations absorb water through capillary action, often remaining saturated even when surface areas appear dry. Professional restoration teams like Wade's Restoration use specialized moisture meters and infrared cameras to locate trapped moisture and ensure framing studs reach safe baseline dry standards.
When does basement flooding require immediate professional extraction instead of DIY cleaning?
Professional extraction is necessary when water involves sewage backups, submerged electrical systems, foundation shifting, or when drying cannot be completed within the EPA's 48-hour window. In these severe scenarios, call Wade's Restoration for a guaranteed 45-minute emergency response and certified structural mitigation.
About the author
 |
David Harrison David Harrison is a certified water damage restoration technician with over 8 years of experience in the field. He holds a degree in Construction Management from Pratt Institute and specializes in providing practical advice for navigating property emergencies and insurance claims. |
Water damage, flood, or mold emergency?
We’re available now - call for a fast, free estimate.
Call Now - Free Estimate